Welcome to the Hampton Bay Ceiling Fan User Manual. Thank you for your purchase. This guide provides essential safety, installation, and operation details for optimal performance.
1.1 Welcome and Thank You for Purchasing
Thank you for choosing Hampton Bay! Your new ceiling fan is designed to enhance your home’s comfort and aesthetics. Manufactured with high safety and quality standards, this product promises reliable performance. Before use, please read this manual carefully to ensure proper installation and operation. Note: Some models may be subject to recall notices, such as the Hampton Bay Mara fan, due to blade detachment risks. Always verify your model and follow safety guidelines. For assistance, contact Hampton Bay Customer Service at 1-855-HD-HAMPTON or visit hamptonbay.com. Your satisfaction is our priority, and we are here to help you enjoy your purchase.
1.2 Important Safety Information
To ensure safe operation, read this manual thoroughly. Install the fan with an isolating wall switch to reduce electric shock risk. Turn off power at the circuit breaker before installation. Avoid using water or harsh detergents for cleaning. Note: Some models, like the Hampton Bay Mara, have been recalled due to blade detachment risks. Verify your model and follow safety guidelines. Do not use solid-state speed control devices with this fan. For concerns or recalls, contact Hampton Bay Customer Service at 1-855-HD-HAMPTON or visit hamptonbay.com. Your safety is a top priority, and proper precautions ensure optimal performance.
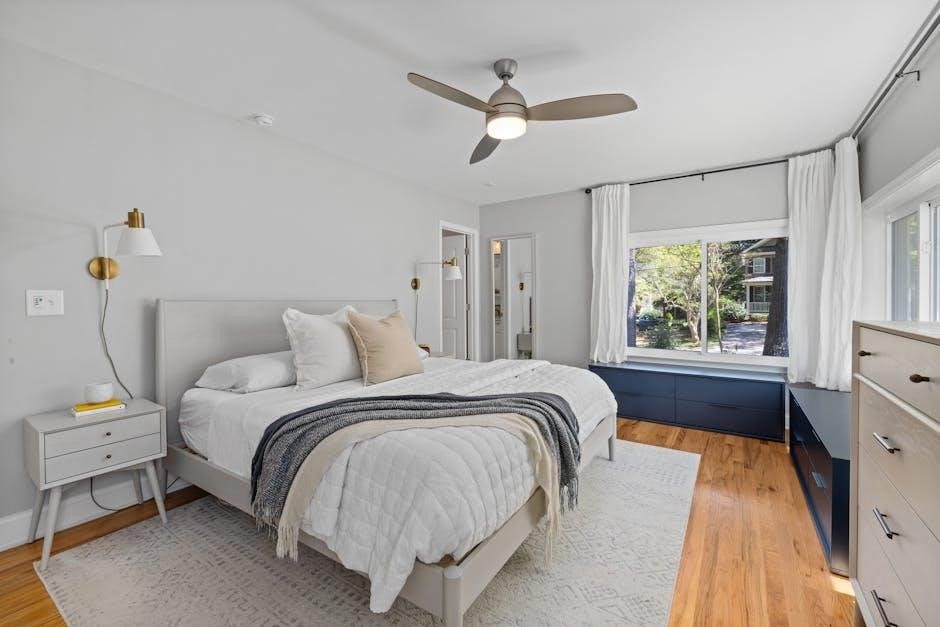
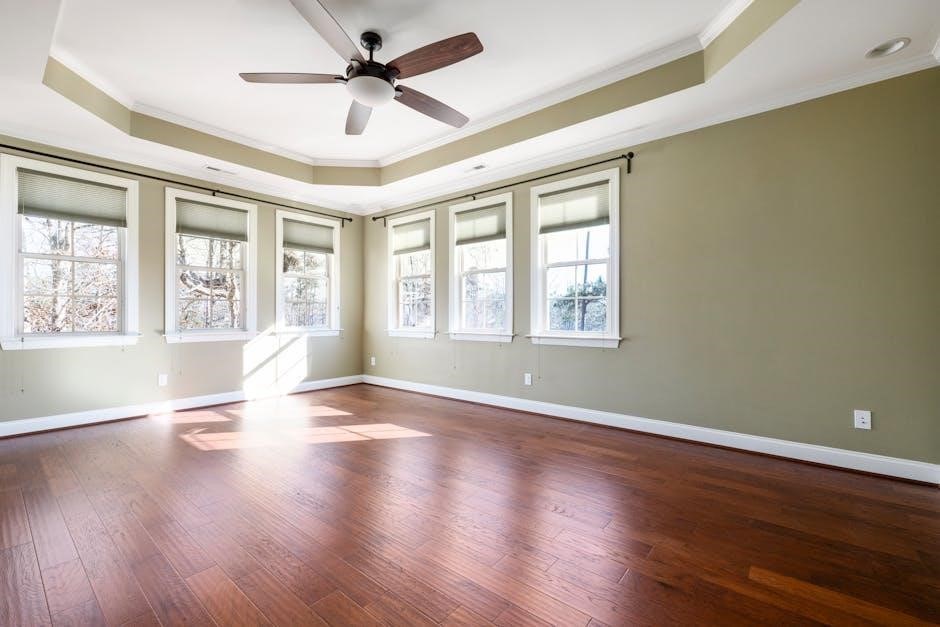
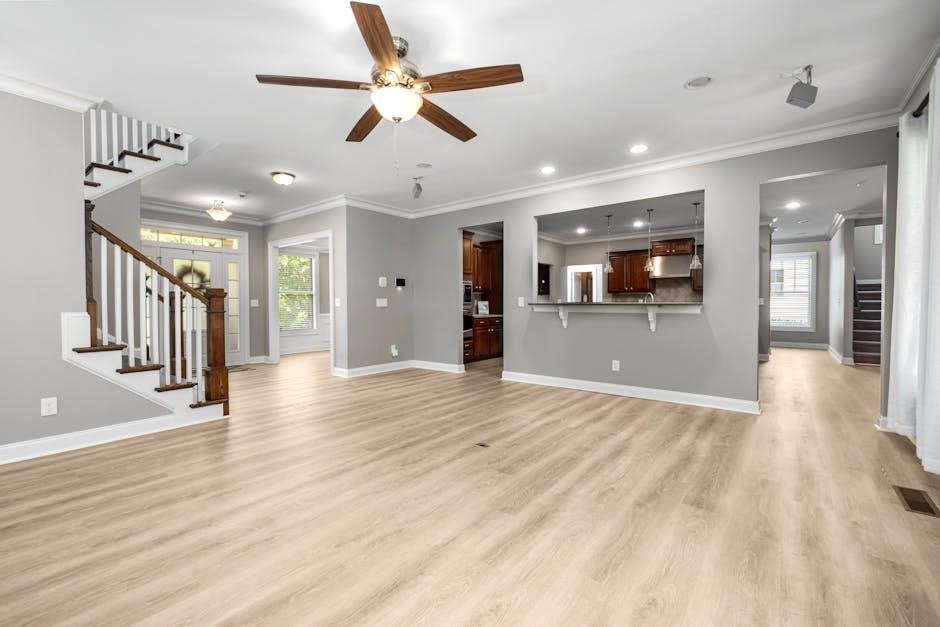
Product Features and Specifications
Hampton Bay ceiling fans feature energy-efficient designs, multiple speed settings, and stylish finishes. They include standard mounting hardware and compatibility with optional accessories like light kits and remote controls.
2.1 Standard Features of Hampton Bay Ceiling Fans
Hampton Bay ceiling fans come with a range of standard features designed for performance and style. These include energy-efficient motors, multiple fan speeds, and reversible operation for year-round use. The fans typically have a sturdy mounting system, ensuring secure installation on standard ceilings. Many models also feature a pull-chain control for easy speed adjustment, while others may be compatible with remote controls or wall switches. The blades are crafted from durable materials, such as wood or ABS plastic, and are finished in various styles to complement any home decor. Additionally, some models include integrated lighting kits, providing both illumination and airflow control.
2.2 Optional Accessories and Upgrades
Enhance your Hampton Bay ceiling fan with optional accessories and upgrades for added functionality and style. These include light kits, remote controls, and wall-mounted switches, allowing for convenient operation. Some fans are compatible with smart home devices, enabling voice or app control. Additional blade sets in various finishes can refresh the fan’s appearance. For angled ceilings, a slope adapter ensures proper installation and stability. Energy-efficient LED light bulbs are also available, providing brighter, longer-lasting illumination. These accessories and upgrades can be purchased separately or bundled, offering a customizable solution to meet your specific needs and preferences, ensuring your fan remains both functional and fashionable for years to come.
2.3 Technical Specifications and Compatibility
The Hampton Bay ceiling fan is designed with a high-quality motor for smooth operation and durability. Standard models feature a 54-inch blade span, ideal for medium to large rooms. The fan operates at 120V/60Hz, ensuring compatibility with most household electrical systems. Dual mounting options—standard and angled—allow installation on flat or sloped ceilings up to 30 degrees. The fan’s airflow capacity is optimized for energy efficiency, providing a cooling breeze while maintaining low power consumption. Compatibility with optional light kits and smart home devices enhances functionality. Ensure all components meet local electrical codes and regulations for safe installation and operation, guaranteeing optimal performance in various settings and environments.
Installation Instructions
Ensure power is off at the circuit breaker before starting. Assemble fan components, secure the mounting bracket, and connect wires according to the provided diagram. Tighten all screws firmly and test operation after completion.
3.1 Pre-Installation Checks and Requirements
Before installing your Hampton Bay ceiling fan, ensure the power is turned off at the circuit breaker. Verify that the ceiling can support the fan’s weight and that the mounting bracket is securely attached. Check for any damage to the fan or its components. Ensure all necessary tools and parts are available. Familiarize yourself with local electrical codes and regulations. If installing on an angled ceiling, confirm the fan is compatible with such a setup. Always follow the manufacturer’s guidelines to ensure a safe and proper installation. If unsure, consult a licensed electrician for assistance. Proper preparation ensures a smooth installation process.
3.2 Step-by-Step Installation Guide
Turn off the power to the ceiling fan circuit at the breaker box. Verify the power is off using a voltage tester.
Assemble the fan motor housing and blades according to the manufacturer’s instructions.
Install the mounting bracket to the ceiling junction box, ensuring it is securely fastened.
Hang the fan motor from the mounting bracket and connect the wiring. Match the black (hot), white (neutral), and copper (ground) wires.
Secure the fan to the bracket and attach the canopy to cover the wiring.
Install the light kit or any optional accessories as described in the manual.
Turn the power back on and test the fan to ensure proper operation.
Follow these steps carefully to ensure a safe and successful installation.
3.3 Special Considerations for Angled Ceilings
For angled ceilings, ensure the fan is installed with an angle mounting bracket to maintain proper balance and stability. This bracket is specifically designed for ceilings with slopes greater than 30 degrees. Before installation, verify that the bracket is compatible with your Hampton Bay ceiling fan model. Tighten all screws securely to prevent wobbling. If your ceiling has a steep angle, consider consulting a professional to ensure the installation meets safety standards. Additionally, check the fan’s balance by spinning it manually after installation to avoid vibration issues. If vibrations occur, adjust the blade alignment or use balance clips provided with the fan. Always follow the manufacturer’s guidelines for angled ceiling installations to ensure optimal performance and safety.
Operation and Control
Use the pull chain or remote to adjust fan speed and light settings. Ensure the fan is turned off before cleaning or replacing parts for safety.
4.1 Understanding Fan Speed Settings
Hampton Bay ceiling fans typically feature three to four speed settings, including high, medium, low, and off. These settings are designed to provide optimal airflow for various conditions. In warmer weather, higher speeds circulate air to enhance cooling. Conversely, lower speeds are ideal for circulating heat in cooler months. The pull chain or remote control allows easy adjustment of these settings. Proper use of speed settings ensures energy efficiency and consistent comfort. Always refer to the manual for specific instructions tailored to your fan model. Regular maintenance and cleaning ensure smooth operation across all speed settings.
4.2 Using the Pull Chain or Remote Control
The pull chain and remote control offer convenient ways to operate your Hampton Bay ceiling fan. The pull chain typically controls fan speed: one pull for high, two for medium, three for low, and four to turn it off. The remote control provides similar functionality, often with additional features like a reverse button to change blade direction. Ensure the remote has fresh batteries and is within range for proper operation. Always refer to the remote’s instructions for specific button functions. Regularly check and replace remote batteries to maintain reliability. For troubleshooting, ensure the fan receiver is properly connected to power and aligned with the remote. If issues persist, consult the troubleshooting section or contact customer support.
4.3 Troubleshooting Common Operational Issues
If your Hampton Bay ceiling fan isn’t functioning properly, check the power source and ensure the wall switch is on. Verify the pull chain is securely attached and functioning. If the fan wobbles, tighten loose screws or balance the blades using the provided balancing kit. For unusual noises, inspect blades for debris or damage. If the fan doesn’t respond to controls, ensure the remote batteries are fresh and the receiver is properly connected. For blade detachment issues, stop use immediately and contact customer support. Refer to the manual for detailed solutions or visit Hampton Bay’s website for additional resources. Always prioritize safety and consult a professional if unresolved issues persist.
Maintenance and Cleaning
Regularly clean your Hampton Bay ceiling fan using a dry cloth to remove dust. Avoid water or detergents. Inspect blades for debris and ensure all screws are tightened for stability.
5.1 Recommended Cleaning Methods
To maintain your Hampton Bay ceiling fan’s efficiency and safety, clean it regularly using a dry, soft cloth. For tougher dust, lightly dampen the cloth with water but avoid harsh chemicals or detergents. Never use water directly on the fan or its components, as this could cause electrical issues or damage the finish. Always turn off the power at the circuit breaker before cleaning. For blade cleaning, gently wipe each blade individually, starting from the center and moving outward. Avoid using abrasive materials that might scratch the surface. Regular cleaning prevents dust buildup, ensuring optimal airflow and reducing fire hazards. Clean the fan every 1-2 months for best performance.
5.2 Inspecting and Replacing Parts
Regularly inspect your Hampton Bay ceiling fan for wear or damage. Check fan blades for cracks, dents, or imbalance, which can cause vibration or poor performance. Inspect the mounting hardware, screws, and electrical connections for tightness and integrity. If a blade is damaged, replace it with a genuine Hampton Bay part to ensure safety and balance. For light kits or remote controls, refer to the specific instructions provided with the accessory. Never use non-authentic replacement parts, as they may void the warranty or pose safety risks. If you find any damaged electrical components, disconnect power immediately and contact a licensed electrician. Replace worn-out or faulty parts promptly to maintain optimal performance and safety. Always follow the manufacturer’s guidelines for replacement procedures.
5.3 Seasonal Maintenance Tips
Perform seasonal checks to ensure your Hampton Bay ceiling fan operates efficiently year-round. In spring and fall, clean the fan blades thoroughly to remove dust buildup, which can affect airflow. During winter, consider reversing the fan direction to circulate warm air downward, enhancing heating efficiency. In summer, ensure the fan runs counterclockwise to maximize cooling. Inspect the fan balance and tighten any loose screws to prevent wobbling. If you live in an area with high humidity or salt air, apply a rust-inhibiting spray to metal parts. Store remote controls and accessories in a dry place during off-seasons. Regularly check for worn-out parts and replace them as needed to maintain optimal performance and extend the fan’s lifespan. Seasonal maintenance ensures consistent functionality and energy efficiency throughout the year.

Safety Precautions
Always follow safety guidelines to avoid accidents. Ensure the fan is installed with an isolating wall switch and avoid using water for cleaning. Refer to the manual for specific instructions.
6.1 General Safety Warnings
Thank you for choosing Hampton Bay! To ensure safe operation, always follow these guidelines: Install the fan with an isolating wall switch to prevent electric shock. Avoid using water or detergents for cleaning, as they may damage the fan. Ensure all screws are tightly secured to prevent blade detachment during operation. Never operate the fan if it shows signs of damage or malfunction. Keep children away from the fan while it is running. For stability, ensure the ceiling can support the fan’s weight. If unsure, consult a licensed electrician. Always turn off the power before performing any maintenance. Follow all instructions carefully to avoid accidents and ensure optimal performance. Visit www.hamptonbay.com for additional safety resources.
6.2 Electrical Safety Guidelines
Always disconnect the power supply at the circuit breaker before installing or servicing the fan. Use a UL-listed mounting box to ensure secure installation and prevent electrical hazards. Avoid using solid-state speed control devices, as they may cause malfunctions. Ensure all electrical connections are made correctly to prevent short circuits. If unsure, consult a licensed electrician, especially for complex wiring. Never exceed the recommended wattage for the fan’s light kit. Keep electrical components dry and avoid touching wires during installation. For added safety, install an isolating wall switch to control the fan’s power. Refer to the wiring diagram in the manual for proper connections. Always follow local electrical codes and regulations to ensure compliance and safety.
6.3 Handling and Moving the Fan Safely
Always handle the ceiling fan with care to avoid damage or injury. When moving the fan, ensure it is unplugged from the power source. Use two people to carry large or heavy fans to prevent accidents. Keep children and pets away during installation or relocation. Secure all loose parts, such as blades or light kits, to prevent them from detaching and causing harm. Avoid touching electrical components or wires during handling. When lifting, hold the fan firmly by the base or mounting bracket to maintain control. Never leave the fan unattended while moving it, and ensure the area is clear of obstacles. Proper handling ensures safety and maintains the fan’s functionality.
Troubleshooting and Repairs
Identify common issues like blade detachment or electrical malfunctions. Check screws, wiring, and balance for stability. Contact Hampton Bay support for further assistance or replacement parts.
7.1 Common Issues and Solutions
Common issues with Hampton Bay ceiling fans include blades detaching during operation, electrical malfunctions, and imbalance causing wobbling. For blade detachment, inspect screws and ensure they are tightly secured. Electrical issues may require checking wiring connections or consulting a licensed electrician. Imbalance can be corrected by adjusting blade alignment or replacing worn-out mounting hardware. If the fan doesn’t respond to controls, ensure the pull chain or remote is functioning properly and batteries are replaced if necessary. Additionally, ensure the fan is installed with an isolating wall switch to prevent electrical shock. For persistent problems, contact Hampton Bay customer support for assistance or replacement parts.
7.2 Diagnosing Electrical or Mechanical Problems
Diagnosing electrical or mechanical issues with your Hampton Bay ceiling fan begins with identifying symptoms. For electrical problems, check if the fan responds to controls or if lights flicker, indicating wiring issues. Ensure the power source is stable and the isolating wall switch is functioning. For mechanical issues, inspect for unusual noises, vibrations, or blades not spinning evenly. Verify all screws and mounting hardware are secure. If blades detach, stop use immediately and contact support. Consult the manual or online resources for troubleshooting guides. If unresolved, contact Hampton Bay customer service for professional assistance or replacement parts. Always prioritize safety by disconnecting power before repairs.
7.3 Guidance on Repairing or Replacing Components
For repairing or replacing components, ensure the fan is disconnected from power. Use genuine Hampton Bay parts to maintain safety and performance. Basic tools like screwdrivers and pliers are typically required. If replacing blades, remove screws, detach the blade, and secure the new one firmly. For light kits or remote controls, refer to the specific installation instructions. If issues persist after DIY repairs, contact Hampton Bay customer support. Replacement parts can be ordered through Home Depot or Hampton Bay’s official website. Always follow safety guidelines to avoid electrical risks. If unsure, consult a licensed electrician for professional assistance. Regular maintenance ensures longevity and optimal functioning of your ceiling fan.
Thank you for choosing Hampton Bay! Enjoy your new ceiling fan. For further assistance, register your product at hamptonbay.com or contact customer support at 1-855-HD-HAMPTON.
8.1 Final Tips for Optimal Performance
To ensure your Hampton Bay ceiling fan operates at its best, clean it regularly with a dry cloth and avoid using harsh chemicals. Seasonally adjust the blade direction for energy efficiency. Always check for loose screws and balance the blades if wobbling occurs. Use the correct speed settings for your comfort and consider pairing the fan with a smart control for convenience. Avoid exposing the fan to extreme temperatures or moisture unless it’s an outdoor model. For any issues, refer to the troubleshooting guide or contact customer support. By following these tips, you’ll enjoy a quiet, efficient, and long-lasting performance from your ceiling fan.
8;2 Contact Information for Customer Support
For any questions or concerns regarding your Hampton Bay ceiling fan, please contact our dedicated customer support team. You can reach us by phone at 1-855-HD-HAMPTON (1-855-434-2678) Monday through Friday, from 8 a.m. to 7 p.m. ET. Additionally, visit our official website at hamptonbay.com for troubleshooting guides, manuals, and repair resources. For immediate assistance, use the live chat feature on our website or submit a request through our contact form. Always have your product model number and purchase details ready to expedite your inquiry. We are committed to providing prompt and reliable support to ensure your satisfaction with your Hampton Bay ceiling fan.
8.3 Warranty Information and Terms

Your Hampton Bay ceiling fan is backed by a limited warranty covering manufacturing defects in materials and workmanship. The standard warranty period is typically five years for motor parts and two years for other components. For detailed terms, visit hamptonbay.com. The warranty does not cover damage caused by improper installation, misuse, or failure to follow maintenance guidelines. To file a warranty claim, contact customer support at 1-855-HD-HAMPTON with proof of purchase and product details. Ensure compliance with all safety and installation instructions to maintain warranty validity. Refer to the official website for full terms and conditions.
Leave a Reply