
Welcome to the Pandigital Multimedia Photo Frame, designed to display your digital photos directly from a memory card without needing a computer․ Effortlessly enjoy slideshows, play music, and set alarms with this user-friendly device․
Overview of the Pandigital Multimedia Photo Frame
The Pandigital Multimedia Photo Frame is a versatile device designed to display digital photos directly from a memory card․ It offers an intuitive interface for navigating through images, videos, and music․ With its sleek design, it enhances home decor while providing functionality․ The frame supports various media formats and includes features like slideshow customization, alarm clock settings, and remote control operation․ It’s an ideal solution for effortlessly showcasing cherished memories without the need for a computer․
Contents of the Delivery Package
The Pandigital Photo Frame package includes the digital photo frame, a remote control, a power adapter, and a user manual․ Additional items may vary by model but often include a memory card slot and necessary cables․ Ensure all components are present before setup․ The remote control allows easy navigation, while the power adapter ensures reliable operation․ The user manual provides detailed instructions for setup and troubleshooting․ Check for any plastic inserts, such as those covering the remote control battery compartment, and remove them before use․ This ensures optimal functionality from the start․

Safety Precautions and Warnings
Read all warnings before use to avoid injury or damage․ Avoid exposing the device to water or extreme temperatures․ Handle by the plug, not the cord․ Dispose properly․
Important Safety Information
Read all safety precautions carefully before using your Pandigital Photo Frame․ Avoid exposing the device to water, moisture, or extreme temperatures․ Do not insert sharp objects or liquids into openings․ Use only the provided power adapter to prevent damage․ Keep the device out of reach of children and pets․ Handle the frame by the plug when disconnecting the power; Ensure proper ventilation to avoid overheating․ Dispose of the device and packaging responsibly, following local regulations․ Failure to comply may result in injury, damage, or void the warranty․ Always follow the manufacturer’s guidelines for safe operation․
Handling and Environmental Disposal
Handle the Pandigital Photo Frame with care to avoid scratches or damage․ Avoid touching the screen to prevent fingerprints and smudges․ For disposal, recycle the device responsibly to minimize environmental impact․ Separate the frame, power adapter, and packaging materials for proper recycling․ Dispose of batteries and electronic components according to local e-waste regulations․ Do not discard the device in regular household waste․ Ensure all personal data is erased before disposal․ Proper environmental disposal helps conserve natural resources and reduces landfill waste․

Setting Up the Pandigital Photo Frame
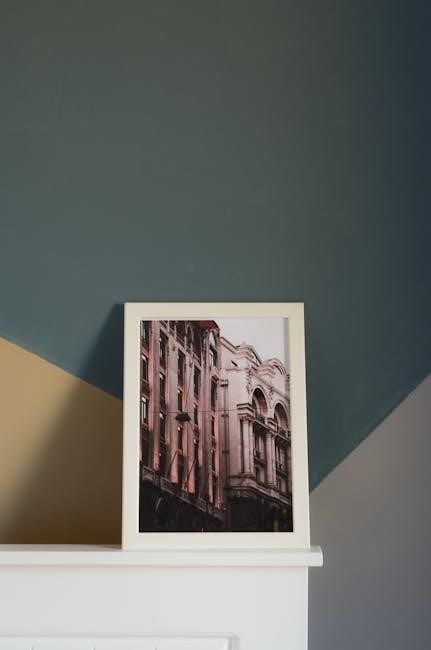
Unbox and plug in the Pandigital Photo Frame․ Insert the memory card, turn it on, and it will automatically start a slideshow of your photos․
Unboxing and Initial Setup
Start by carefully unboxing your Pandigital Photo Frame․ Remove all packaging materials and ensure the frame is free from plastic inserts․ Locate the remote control and remove any protective covering․ Place the frame on a stable surface and ensure it is away from direct sunlight or moisture․ Before turning it on, ensure the memory card is properly inserted․ Once powered on, the frame will automatically detect the memory card and begin displaying your photos in a slideshow format․ Follow the on-screen instructions to complete the initial setup process smoothly․
Connecting the Power Supply
To connect the power supply, first ensure the Pandigital Photo Frame is turned off․ Locate the DC power port on the back of the frame and insert the provided power adapter firmly․ Plug the other end of the adapter into a nearby electrical outlet․ Make sure the outlet is easily accessible and not overloaded․ Avoid using damaged cords or loose connections to prevent electrical hazards․ Once connected, the power LED will illuminate, indicating the frame is ready for use․ Handle the power cord with care to avoid damage or tangles during operation․
Inserting the Memory Card
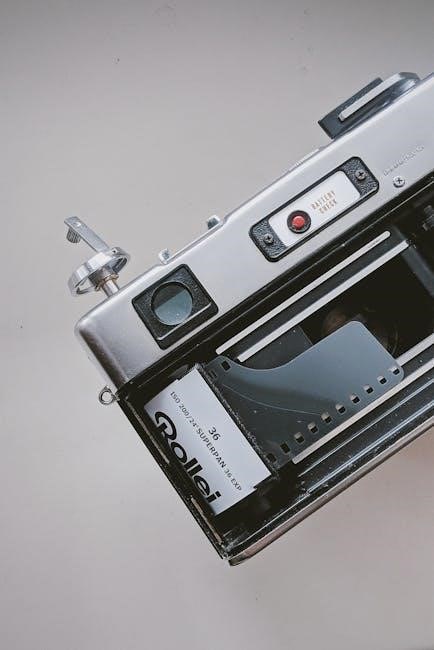
To insert the memory card, locate the card slot on the side or back of the Pandigital Photo Frame․ Gently push the memory card into the slot until it clicks securely into place․ Ensure the card is fully inserted and oriented correctly, with the label facing outward․ The frame supports various memory card formats, such as SD, SDHC, and MMC․ Once inserted, the frame will automatically detect the card and display its contents․ If the frame does not recognize the card, ensure it is formatted correctly or try reinserting it․ Avoid touching the card’s electronic contacts to prevent damage․
Basic Operations and Navigation
Mastering basic operations allows seamless navigation of the Pandigital Photo Frame․ Use the remote control or built-in buttons to scroll through menus, select options, and start slideshows; The intuitive interface ensures easy access to features like photo viewing, music playback, and alarm settings․ Navigate effortlessly with clear on-screen instructions and responsive controls, enhancing your overall user experience with simplicity and convenience․
Navigating the Menu System
Navigating the Pandigital Photo Frame’s menu system is straightforward․ Use the remote control or built-in buttons to access the main menu, where you can select options like photo viewing, slideshow settings, and device configuration․ The navigation buttons allow you to scroll up or down through the menu items, while the OK button confirms your selection․ Pressing the Back button returns you to the previous screen․ On-screen instructions guide you through each process, ensuring easy access to features like slideshow customization, alarm setup, and display adjustments․ This intuitive design makes it simple to explore and utilize all the frame’s capabilities․
Using the Remote Control
The remote control provides convenient navigation and operation of your Pandigital Photo Frame․ Ensure the remote is within range and the plastic insert is removed before use․ Key buttons include Power to turn the frame on/off, Menu to access settings, and navigation buttons (Up, Down, Left, Right) to scroll through options․ The OK button confirms selections, while Back returns to the previous screen․ Use the remote to start slideshows, adjust volume, or customize settings․ Always aim the remote directly at the frame for optimal functionality and explore its full potential to enhance your user experience․
Starting the Slideshow
To initiate the slideshow on your Pandigital Photo Frame, first ensure the device is powered on and a compatible memory card containing your photos is inserted․ The slideshow may begin automatically upon insertion․ If it doesn’t, use the remote control to navigate to the slideshow option in the menu․ Press the OK button to start․ You can customize settings like transition effects and display duration through the menu․ If issues arise, verify the memory card’s compatibility and photo formats․ Refer to the manual for troubleshooting steps․

Advanced Features of the Pandigital Photo Frame
The Pandigital Photo Frame offers versatile functionality, enabling users to play music, videos, and customize slideshows․ Its advanced features also include an alarm clock setup․
Customizing Slideshow Settings
The Pandigital Photo Frame allows users to personalize their slideshow experience by adjusting transition effects, display time, and photo sorting options․ Transition effects can be selected from a variety of styles to enhance the visual appeal of the slideshow․ Display time for each photo can be set to a preferred duration, ensuring a smooth and tailored viewing experience․ Additionally, photos can be sorted by date, filename, or randomly, offering flexibility in how images are presented․ These settings are easily accessible through the menu system, enabling users to create a customized slideshow that matches their preferences․
Setting Up the Alarm Clock
The Pandigital Photo Frame features an alarm clock function, allowing users to wake up to their favorite photos or music․ To set up the alarm, navigate to the menu, select the alarm settings, and choose the desired wake-up time and days of the week․ Users can also select a preferred wake-up option, such as a slideshow or music playback․ The alarm volume can be adjusted for convenience․ Once set, the device will automatically trigger the selected alarm at the specified time, ensuring a pleasant start to the day․
Playing Music and Videos
The Pandigital Photo Frame supports playing music and videos, enhancing your viewing experience․ Insert a memory card containing compatible audio and video files․ Navigate to the media player section in the menu, select your desired file, and press play․ The frame supports various formats, ensuring compatibility with your media․ Use the remote control to adjust volume, pause, or skip tracks․ Videos will display in full screen, while music can play in the background during slideshows, creating a personalized ambiance․ This feature adds versatility to your digital photo frame․

Customization and Settings
The Pandigital Photo Frame allows you to customize display settings like brightness and contrast for optimal viewing․ Adjust language preferences and set the time to personalize your experience․
Adjusting Display Settings (Brightness, Contrast)
To enhance your viewing experience, the Pandigital Photo Frame allows you to adjust display settings such as brightness and contrast․ Using the remote control or the frame’s control buttons, navigate to the display settings menu․ Select “Brightness” or “Contrast” and use the arrow keys to increase or decrease the levels until the image appears optimal․ These adjustments ensure your photos are displayed with clarity and vibrancy․ Regularly check and refine these settings to maintain the best visual quality for your slideshows and stored media․ Proper calibration enhances overall picture quality and viewing pleasure․
Setting the Language and Time
To personalize your Pandigital Photo Frame, navigate to the settings menu using the remote control or frame buttons․ Select “Language” to choose your preferred option for menu displays․ Next, go to the “Time” setting to adjust the clock․ Use the arrow keys to set the correct hour and minute․ Ensure the time is accurate for features like the alarm clock to function properly․ These settings enhance user convenience and ensure all features operate seamlessly․ Regularly check and update the time to maintain consistency with your schedule․

Troubleshooting Common Issues
If the frame doesn’t turn on, check the power connection․ For memory card errors, ensure it’s properly inserted and compatible․ Restart the device if it freezes․
Resolving Memory Card Recognition Problems
If your Pandigital Photo Frame doesn’t recognize a memory card, ensure it’s fully inserted and compatible with the frame․ Check for visible damage or dirt on the card and clean the gold contacts gently․ Use a soft cloth to wipe the contacts․ Try a different memory card to isolate the issue․ If problems persist, format the card using the frame’s menu or on a computer, then reload your photos․ Always back up your data before formatting․
Fixing Frozen or Unresponsive Screens
If the Pandigital Photo Frame’s screen freezes or becomes unresponsive, start by disconnecting the power cord and waiting 30 seconds before reconnecting it․ This resets the device․ If the issue persists, use a small pin to press the reset button located at the back or bottom of the frame․ Ensure the firmware is up to date, as outdated software can cause freezing․ If problems continue, contact customer support for further assistance or potential repair options․ Always follow safety precautions when handling electrical devices․
Maintenance and Care
Regularly clean the screen with a soft, dry cloth to avoid dust buildup․ Avoid harsh chemicals or abrasive materials that could damage the display․ Update firmware periodically to ensure optimal performance and fix any software-related issues․ Store the frame in a cool, dry place to prevent damage from moisture or extreme temperatures․ Proper care extends the lifespan and maintains the clarity of your Pandigital Photo Frame․
Cleaning the Screen and Frame
To maintain your Pandigital Photo Frame’s clarity, clean the screen regularly with a soft, dry cloth․ Avoid harsh chemicals or abrasive materials․ For stubborn smudges, lightly dampen the cloth with distilled water, but never apply liquid directly to the screen․ Gently wipe in one direction to prevent streaks․ For the frame, use a soft cloth to remove dust or fingerprints․ Regular cleaning ensures optimal display quality and extends the device’s lifespan․ Always turn off the frame before cleaning to avoid any accidental damage or electrical issues․ Proper care will keep your photos looking their best․
Updating Firmware (If Applicable)
To ensure optimal performance, periodically check for firmware updates for your Pandigital Photo Frame․ Visit the official Pandigital website or use the frame’s built-in update feature, if available․ Download the latest firmware version to your computer, then transfer it to a memory card․ Insert the card into the frame and follow on-screen instructions to complete the update․ Do not interrupt the process, as it may damage the device․ Updating firmware enhances functionality, fixes bugs, and improves compatibility with media formats․ Always follow the manufacturer’s instructions carefully to avoid issues․
Additional Resources and Support
For further assistance, visit the official Pandigital website to access the user manual, contact customer support, or review warranty information for your photo frame․
Accessing the User Manual Online
To access the Pandigital Photo Frame user manual, visit the official Pandigital website․ Download the PDF manual for models like PI1003DW, PI7002AW, and PI9001DW․ This guide provides detailed instructions for setup, troubleshooting, and advanced features․ It also includes safety precautions and warranty information․ Ensure you refer to the correct model number for accurate instructions․ The manual is available in multiple languages and formats, making it accessible for all users․ Regularly check for firmware updates to optimize your photo frame’s performance․
Contacting Customer Support
For assistance with your Pandigital Photo Frame, visit the official Pandigital website for customer support options․ You can submit inquiries via email or call their support hotline․ Ensure you have your product model number ready for efficient service․ Support is available during business hours, and responses are typically provided within 24-48 hours․ Additionally, refer to the user manual for troubleshooting tips before contacting support․ Pandigital’s customer service team is committed to resolving issues promptly and ensuring a positive user experience․
Warranty Information
The Pandigital Photo Frame is backed by a limited one-year warranty covering manufacturing defects․ Accessories, such as the remote control and power adapter, are typically covered for 90 days․ To validate your warranty, ensure the product is registered on the Pandigital website within 30 days of purchase․ The warranty excludes damage caused by misuse, tampering, or normal wear and tear․ For warranty claims, contact customer support with proof of purchase and a detailed description of the issue․ Pandigital reserves the right to repair or replace defective units at their discretion․
Leave a Reply