The Singer Simple Sewing Machine is a user-friendly, automatic sewing machine designed for basic sewing functions․ It features a 1-step buttonhole, free arm, and is ideal for beginners and experienced sewers alike․ Known for its reliability and versatility, it supports various fabric types and creative projects, making it a popular choice for home use․
1․1 Overview of the Singer Simple Sewing Machine
The Singer Simple Sewing Machine is a compact, lightweight, and easy-to-use sewing machine designed for both beginners and experienced sewers․ It offers a range of features that make sewing efficient and enjoyable․ With its automatic functions and versatile stitching options, it is ideal for crafting, repairing, and creating various fabric projects․ The machine is equipped with a free arm, allowing easy access to hard-to-reach areas, and a 1-step buttonhole feature for quick and precise buttonhole creation․ Its intuitive design ensures smooth operation, making it a popular choice for home use․ Whether for basic repairs or creative projects, the Singer Simple Sewing Machine provides reliable performance and simplicity in every stitch․
1․2 Importance of Reading the Manual
Reading the manual for the Singer Simple Sewing Machine is essential to ensure safe and effective use․ It provides detailed guidance on operating the machine, understanding its features, and troubleshooting common issues․ The manual outlines safety precautions, such as keeping fingers away from moving parts and proper needle usage, to prevent accidents․ It also explains how to maintain the machine, including regular cleaning and oiling, to extend its lifespan․ By following the manual, users can maximize the machine’s potential, explore its stitching options, and handle fabrics appropriately․ Whether you’re a beginner or an experienced sewer, the manual serves as a comprehensive resource to help you get the most out of your Singer Simple Sewing Machine․ It is available digitally for easy access and reference․

Safety Precautions and Guidelines
Always follow basic safety precautions when using the Singer Simple Sewing Machine․ Keep fingers away from moving parts, avoid using near children, and ensure proper electrical safety․
2․1 General Safety Guidelines
Always prioritize safety when using the Singer Simple Sewing Machine․ Read the manual thoroughly before operation to understand proper usage and precautions․ Keep fingers and loose clothing away from moving parts, such as the needle and feed dog․ Avoid using the machine near children, as it may pose a hazard․ Ensure the machine is placed on a stable, flat surface to prevent accidents․ Never operate the machine with wet hands or in damp environments, as this could lead to electrical hazards․ Use only genuine Singer parts and accessories to maintain safety standards․ Regularly inspect the machine for damage or wear and tear․ If unsure about any aspect, consult the manual or contact a professional․ Safety is paramount to ensure a smooth and enjoyable sewing experience․
2․2 Specific Precautions for the Singer Simple
For the Singer Simple Sewing Machine, ensure the needle is always in the highest position before turning it off․ Use only Singer-recommended needles to prevent damage․ Regularly oil the machine as specified to maintain smooth operation․ Avoid sewing near flammable materials or in areas with high humidity․ Keep the machine away from children and never let it be used as a toy․ Always use the correct presser foot for the type of fabric being sewn to avoid fabric bunching or machine damage․ Do not pull fabric excessively while sewing, as this may misalign the feed dog․ Store the machine in a dry, cool place when not in use․ Follow the manual’s guidelines for winding bobbins and threading to prevent thread breakage or tangles․ Specific to the Singer Simple, ensure the bobbin is properly seated to avoid stitching issues․ Always unplug the machine during maintenance or when replacing parts․ Never use damaged or frayed power cords, as this could lead to electrical hazards․ Regularly clean the feed dog and hook area to remove lint and debris, which can affect stitch quality․ For optimal performance, avoid sewing multiple layers of thick fabric without adjusting the machine settings․ If the machine vibrates excessively, check for proper assembly or balance․ Always refer to the manual for specific care instructions tailored to the Singer Simple model․ By adhering to these precautions, you can ensure safe and efficient operation of your Singer Simple Sewing Machine․
Parts of the Machine and Their Functions
The Singer Simple Sewing Machine features essential parts such as the needle, presser foot, bobbin, and feed dog, each designed for specific functions to ensure smooth sewing operations․
3․1 Overview of Key Components
The Singer Simple Sewing Machine is composed of several essential parts that work together to ensure smooth and efficient sewing․ The machine features a sturdy frame, a powerful motor, and a user-friendly control panel․ Key components include the needle, presser foot, bobbin, and feed dog, which are vital for fabric movement and stitching․ Additional parts like the spool pin, tension discs, and stitch selection dial allow for easy thread management and stitch customization․ Understanding these components is crucial for proper machine operation and maintenance․ Each part plays a specific role, ensuring that the machine functions optimally for various sewing tasks․ Familiarizing yourself with these elements will enhance your sewing experience and help you troubleshoot common issues effectively․
3․2 Detailed Description of Each Part
The Singer Simple Sewing Machine comprises several critical components, each designed for specific functions․ The needle is essential for creating stitches and must be replaced regularly․ The presser foot holds fabric in place, ensuring even stitching․ The bobbin stores the lower thread and works with the hook to form stitches․ The feed dog moves fabric under the needle, controlling the stitch length․ The spool pin holds the upper thread, while the tension discs regulate thread tightness․ The stitch selection dial allows users to choose from various stitch patterns․ The free arm enables sewing cuffs and sleeves․ Each part is designed for ease of use and durability, ensuring optimal performance․ Regular maintenance, such as cleaning the bobbin area and oiling moving parts, is crucial for longevity․ Understanding these components helps users operate the machine effectively and troubleshoot issues․
Threading the Machine Correctly
Proper threading is essential for smooth operation․ Insert the spool onto the spool pin, guide the thread through the tension discs, and gently pull it to set the tension․ Always ensure the thread is seated correctly in the machine’s guides to avoid misalignment or tangles․ Proper threading ensures consistent stitch quality and prevents common sewing issues․
4․1 Upper Threading Process
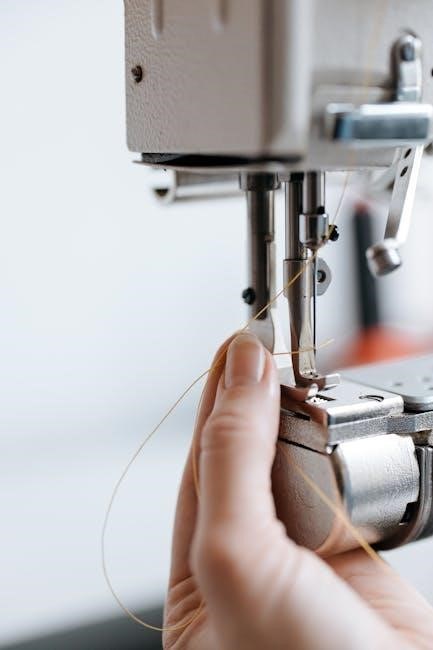
To thread the Singer Simple Sewing Machine, start by placing the spool of thread onto the spool pin․ Gently pull the thread and guide it through the tension discs, ensuring it clicks into place․ Next, pass the thread through the take-up lever, moving it upward․ Continue by threading the machine’s channel, following the marked path․ Finally, insert the thread through the needle eye from front to back․ Pull the thread gently to ensure it is not loose․ Proper upper threading ensures consistent tension and prevents issues like uneven stitches or thread breakage․ Always refer to the manual for specific guidance if uncertain․
4․2 Lower Threading and Bobbin Area
Properly threading the lower part of the Singer Simple Sewing Machine involves the bobbin and bobbin case․ Begin by winding the bobbin with the appropriate thread type, ensuring it is evenly filled but not overfilled․ Insert the bobbin into the bobbin case, making sure it fits securely and the thread is guided through the case’s slot․ Pull the thread gently to set the tension․ Place the bobbin case into the machine’s bobbin area, aligning it correctly under the needle plate․ Ensure the bobbin area is clean and free from lint or debris․ Proper lower threading ensures smooth stitching and prevents issues like uneven tension or thread breakage․ Always refer to the manual for specific guidance if you encounter any difficulties during this process․

Bobbin Setup and Maintenance
Proper bobbin setup and regular maintenance ensure smooth stitching and prevent thread issues․ Regularly clean the bobbin area, check tension, and ensure correct bobbin insertion for optimal performance․
5․1 Winding the Bobbin Correctly
To wind the bobbin correctly, start by turning off the machine and ensuring the presser foot is up․ Thread the machine as described in the manual, then pull the thread through the bobbin winder․ Gently wind the thread around the bobbin in a clockwise direction, keeping it taut but not overly tight․ Once the bobbin is evenly filled, cut the tail and remove it from the winder․ Ensure the thread is properly seated to avoid tangling․ Always use the correct spool cap for the thread type to maintain tension․ Properly wound bobbins are essential for smooth stitching and prevent embroidery or sewing issues․ Regularly clean the bobbin area to ensure optimal performance․
5․2 Inserting the Bobbin Properly
To insert the bobbin correctly, first, locate the bobbin case on the machine․ Open the bobbin case cover and gently place the pre-wound bobbin inside, ensuring the thread unwinds clockwise․ Pull the thread through the tension spring located on the bobbin case․ Guide the thread through the small notch or guide on the case, then lightly tug to ensure proper seating․ Close the bobbin case cover securely and test the thread movement by gently tugging․ Ensure the thread is not tangled or twisted and that the bobbin is aligned correctly․ Proper insertion prevents issues like uneven stitching or thread breakage; Always refer to the manual for specific diagrams if unsure․ Correct bobbin placement is crucial for smooth sewing operation․
Operating the Machine for Beginners
Start with the Singer Simple by plugging it in and ensuring all parts are secure․ Begin with a straight stitch on scrap fabric to practice control and alignment․
6․1 Basic Operation and First Use
Welcome to your Singer Simple Sewing Machine! To begin, ensure the machine is placed on a stable, flat surface and plugged into a nearby power outlet․ Always keep the machine away from water and heat sources․ Before first use, read the manual thoroughly to familiarize yourself with the parts and functions․ Start by threading the machine as instructed, then insert the bobbin correctly; Practice sewing on scrap fabric to get a feel for the machine’s operation․ Use the included needles and bobbins for optimal performance․ The Singer Simple is designed for ease of use, making it perfect for beginners․ With its straightforward controls and versatile stitch options, you can start creating your first projects confidently․
6․2 Starting Your First Sewing Project
Once you’re comfortable with the machine’s basic operation, it’s time to start your first project․ Begin by selecting a simple fabric, such as cotton, and cutting it into a manageable size․ Place the fabric under the needle, aligning the edge with the machine’s guide․ Ensure the machine is set to a straight stitch, the most common choice for beginners․ Gently hold the fabric with both hands, keeping it taut but not too tight․ Slowly press the pedal to begin sewing, maintaining steady control․ Backstitch at the start and end of your seam for durability․ As you sew, keep the work area clear of loose threads or debris․ Experiment with different stitch lengths and widths once you’re comfortable with the basics․ Remember, practice makes perfect—enjoy creating your first project!
Advanced Features and Stitch Selection
The Singer Simple Sewing Machine offers 23 built-in stitches, including straight, zigzag, and decorative options․ Use the stitch selection dial to choose the desired stitch type․ Adjust stitch length and width using the respective buttons to customize your seams․ The machine also features a 1-step buttonhole for quick and easy buttonhole creation․ These advanced features allow for versatility in handling various fabric types and sewing projects, from basic repairs to intricate designs․ Experiment with different settings to achieve the perfect results for your sewing needs․
7․1 Understanding Stitch Options
The Singer Simple Sewing Machine provides 23 built-in stitches, offering versatility for various sewing needs․ These include straight stitch, zigzag, and decorative stitches․ The straight stitch is ideal for basic repairs and sewing straight lines, while the zigzag stitch is perfect for stretching fabrics and preventing fraying․ Decorative stitches add a creative touch to your projects․ Each stitch option is clearly marked on the stitch selection dial, making it easy to choose the right one for your fabric type․ By understanding and utilizing these stitch options, you can enhance the quality and creativity of your sewing projects․ This variety ensures that both beginners and experienced sewers can achieve professional-looking results with ease․
7․2 Adjusting Stitch Length and Width
Adjusting the stitch length and width on the Singer Simple Sewing Machine allows for customization based on fabric type and sewing needs․ The stitch length determines the distance between stitches, while the width affects the zigzag stitch’s span․ Use the stitch length and width adjustment buttons to modify these settings․ The default stitch length is set to 5, but it can be increased or decreased to suit your project․ For delicate fabrics, shorter stitches are recommended, while heavier fabrics may require longer stitches․ Similarly, the stitch width can be adjusted for wider or narrower zigzag stitches․ Always test the settings on scrap fabric before sewing your final project to ensure optimal results․ Proper adjustment ensures even stitching and prevents fabric stretching or puckering․
Maintenance and Troubleshooting Tips
Regularly oil moving parts and clean the feed dog to ensure smooth operation․ For thread jams, check the needle and bobbin area․ Adjust tension if stitches are uneven․
8․1 Regular Maintenance Tips
Regular maintenance is essential to keep your Singer Simple Sewing Machine running smoothly․ Start by oiling the moving parts periodically to prevent friction and wear․ Clean the feed dog and bobbin area regularly to remove lint and debris․ Always use the correct needle type for your fabric to avoid damage․ Check the thread tension and adjust it if necessary to ensure even stitches․ Store the machine in a dry, cool place when not in use․ Refer to the manual for specific lubrication points and cleaning instructions․ Proper care will extend the life of your machine and ensure consistent performance․
8․2 Common Issues and Solutions
Common issues with the Singer Simple Sewing Machine can often be resolved with simple adjustments․ If the machine is not stitching properly, check for loose thread tension or incorrect needle alignment․ Thread bunching under fabric may indicate improper bobbin installation or uneven thread flow․ If the machine jams, turn it off, remove the needle, and gently clear any tangled threads․ Regularly cleaning lint from the bobbin area and feed dog can prevent such issues․ Always refer to the manual for guidance on adjusting stitch length and width․ For persistent problems, consider consulting the troubleshooting section or contacting Singer support․ Proper maintenance and adherence to instructions can help minimize these common issues and ensure smooth operation․
Leave a Reply