
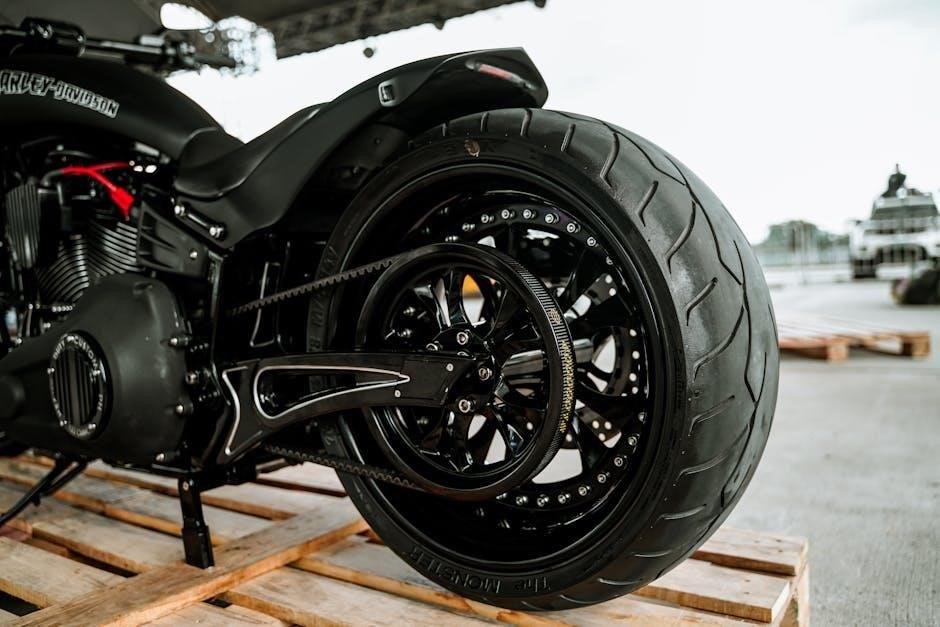
Overview of the Harley Rear Wheel Assembly Diagram
The Harley rear wheel assembly diagram is a detailed guide for constructing and maintaining the rear wheel of a Harley-Davidson motorcycle. It provides step-by-step instructions and visual representations to ensure proper assembly and functionality. This diagram is essential for riders and mechanics‚ offering clarity on component placement and torque specifications.
Importance of Following the Instruction Manual
Following the instruction manual is crucial for ensuring safety and performance. It outlines essential tools‚ torque values‚ and assembly procedures‚ helping users avoid errors that could lead to mechanical failure or safety hazards. The manual serves as a comprehensive resource for both novice and experienced riders.
The Harley Rear Wheel Assembly Diagram provides a comprehensive visual guide for assembling and maintaining the rear wheel of a Harley-Davidson motorcycle. It includes detailed illustrations of components such as the axle nut‚ wheel bearings‚ and brake assembly‚ ensuring proper alignment and installation. The diagram also specifies torque values and step-by-step procedures to guarantee safety and performance. By following this guide‚ riders and mechanics can accurately assemble and adjust the rear wheel‚ preventing potential issues like wobbling or binding. It serves as an essential resource for both novice and experienced enthusiasts.
Following the instruction manual is crucial for ensuring the correct assembly and maintenance of the Harley rear wheel. It provides precise torque specifications‚ step-by-step procedures‚ and safety guidelines to prevent errors. Proper assembly ensures optimal performance‚ safety‚ and longevity of the motorcycle. Neglecting the manual can lead to mechanical failure‚ safety hazards‚ or costly repairs. Adhering to the instructions guarantees that all components‚ such as the axle nut and wheel bearings‚ are installed correctly. This is essential for both novice riders and experienced mechanics to achieve a reliable and secure rear wheel setup.
Safety Precautions
Safety precautions are critical when working on motorcycle components. Always wear protective gear and ensure the motorcycle is properly stabilized to prevent accidents during assembly.
Essential Safety Gear for Working on Harley-Davidson Motorcycles
Safety is paramount when working on your Harley-Davidson. Essential gear includes gloves‚ safety glasses‚ and a face mask to protect against debris. Steel-toe boots are recommended to prevent foot injuries. A well-ventilated workspace is crucial‚ especially when handling chemicals. Ensure the motorcycle is securely supported with jack stands or a center stand to avoid accidental tipping. Proper lighting is also vital for clear visibility. Always refer to the instruction manual for specific safety recommendations tailored to your model and task.
Preparing the Workspace for Assembly
Before starting the rear wheel assembly‚ ensure your workspace is clean and well-organized. Position the motorcycle on a sturdy lift or rear stand to allow the wheel to spin freely. Secure the bike with jack stands for stability. Gather all tools and components within easy reach to streamline the process. Proper lighting is essential for clear visibility. Cover the work area with a protective cloth to prevent damage to surrounding surfaces. Refer to the instruction manual for specific workspace recommendations to ensure a safe and efficient assembly process.
Tools and Materials Needed
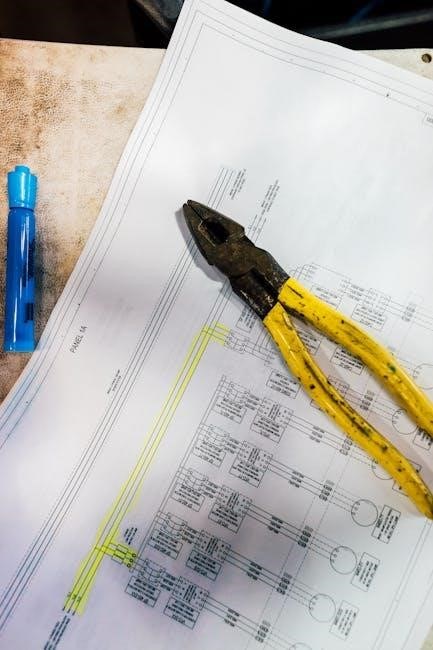
Essential tools include a torque wrench‚ breaker bar‚ pliers‚ punches‚ and socket set. Materials needed are high-strength grease‚ new spacers‚ and any components specified in the manual.
Specialized Tools Required for Rear Wheel Assembly
A 27mm socket is essential for loosening the rear axle nut. A torque wrench ensures proper tightening to specifications‚ while a breaker bar provides leverage for stubborn bolts. A bearing puller is necessary for removing and installing hub bearings. Pliers and punches assist with smaller components‚ and a dial indicator helps check wheel alignment. A pneumatic compressor may be needed for pressing wheel bearings. These tools ensure precision and safety during assembly‚ preventing damage to critical components and ensuring optimal performance. Proper tool usage is vital for a successful rear wheel assembly process.
Common Materials Used in the Assembly Process
The rear wheel assembly process involves high-quality materials such as durable steel alloys for the wheel and axle‚ chromium steel for bearings‚ and rubber compounds for the tire. Stainless steel fasteners‚ including bolts and nuts‚ ensure corrosion resistance and strength. Brake components are typically made from heat-resistant materials to withstand friction and wear. The drive system‚ whether chain or belt-driven‚ uses reinforced polymers or high-carbon steel for reliability. Proper materials ensure longevity‚ safety‚ and optimal performance of the rear wheel assembly.
Detailed Overview of the Rear Wheel Assembly
The rear wheel assembly integrates the hub‚ spokes‚ rim‚ bearings‚ and axle‚ ensuring structural integrity and smooth rotation. Proper assembly aligns with the instruction manual for optimal functionality and safety.
Understanding the Components of the Rear Wheel
The rear wheel assembly consists of several critical components that work together to ensure proper functionality and safety. The hub serves as the central point‚ housing the bearings that allow smooth rotation. Spokes radiate from the hub to the rim‚ providing structural integrity and maintaining the wheel’s shape under stress. The rim is the outer circumference where the tire is mounted‚ and it must be durable to withstand braking forces and tire pressure. The axle is the rod that passes through the hub and attaches the wheel to the motorcycle’s frame‚ requiring precise alignment and secure fastening. Proper understanding and maintenance of these components are essential for optimal performance and rider safety.
Visual Guide to the Harley Rear Wheel Assembly Diagram
The Harley rear wheel assembly diagram provides a clear‚ visual breakdown of the components and their relationships. It includes exploded views of the wheel‚ hub‚ spokes‚ and axle‚ along with detailed labels to identify each part; The diagram highlights torque specifications for critical bolts and nuts‚ often marked with icons or color coding for emphasis. Additionally‚ it illustrates the proper alignment of the wheel and hub‚ ensuring a secure and balanced assembly. Safety icons and step-by-step assembly visuals further enhance understanding‚ making it an indispensable resource for both novice and experienced mechanics.

Pre-Assembly Preparation
Position the motorcycle on a lift or rear stand to ensure the wheel spins freely. Loosen the rear axle nut using a 27mm breaker bar for easier assembly.
Loosening the Rear Axle Nut
Loosening the rear axle nut is a critical step in preparing for rear wheel assembly. Use a 27mm breaker bar to apply sufficient torque while ensuring the motorcycle is securely positioned on a lift or stand. Loosen the nut on the right side but do not remove it completely. This step ensures the wheel can be maneuvered freely during assembly. Always refer to the instruction manual for specific torque values and precautions to avoid rounding the nut or causing damage to the axle. Proper loosening ensures smooth alignment and prevents potential issues during the assembly process.
Positioning the Motorcycle on a Lift or Rear Stand
Positioning the motorcycle on a lift or rear stand is essential for safe and efficient rear wheel assembly. Ensure the bike is centered and balanced on the stand‚ with the rear wheel lifted off the ground. Use sturdy jack stands for additional support if needed. This setup allows unrestricted access to the rear axle and wheel components. Always consult the instruction manual for specific lifting procedures to avoid damage to the motorcycle’s frame or components. Proper positioning ensures stability and prevents accidents during the assembly process.
Step-by-Step Assembly Process
The assembly process involves methodically aligning and securing components‚ starting with the rear axle and wheel‚ followed by the brake assembly and belt tensioning. Always refer to the instruction manual for precise torque specifications and sequencing to ensure optimal performance and safety;
Aligning the Wheel and Hub Components
Aligning the wheel and hub components is critical for proper assembly. Ensure the wheel is centered on the axle‚ with the hub flanges parallel to the frame. Use spacers and bearings as specified in the manual to maintain correct alignment. Tighten the axle nut gradually‚ checking for any wobble or misalignment. Proper alignment prevents uneven wear and ensures smooth operation. Always refer to the diagram for precise positioning and torque specifications to guarantee safety and performance;
Attaching the Brake Assembly to the Wheel
Attaching the brake assembly to the wheel requires precise alignment to ensure proper braking functionality. Begin by securing the brake rotor to the wheel hub using the provided hardware‚ ensuring it is tightly fastened. Next‚ mount the brake caliper over the rotor‚ aligning the brake pads correctly. Connect the brake line to the caliper‚ ensuring no leaks or kinks. Tighten all bolts to the specified torque values as outlined in the manual. Finally‚ test the brakes to confirm they engage evenly and without resistance.
Installing the Rear Axle and Tightening the Nut
Place the motorcycle on a lift or rear stand to ensure the wheel spins freely. Loosen the rear axle nut on the right side using a 27mm socket. Slide the rear axle through the hub‚ ensuring proper alignment with the wheel. Tighten the nut in increments‚ ensuring it is snug but not over-tightened. Apply the initial torque of 20 ft-lbs‚ then tighten further as specified in the manual. Finally‚ check the wheel alignment and spin to confirm smooth operation with no binding or wobble.
Securing the Wheel to the Frame
After aligning the wheel and hub‚ slide the rear axle through the hub and hand-tighten the axle nut. Use a torque wrench to tighten the nut to the specified torque value in the manual. Ensure the spacers are properly seated and the axle is centered. Tighten the nut incrementally‚ checking alignment and ensuring the wheel spins freely. Once secure‚ double-check the torque specification to confirm the axle is snug but not over-tightened. Properly securing the wheel to the frame ensures stability and safety while riding.
Adjusting and Tensioning the Belt or Chain
Loosen the rear axle nut slightly to allow belt or chain adjustment. Use a torque wrench and belt tension gauge to achieve the specified tension. For belts‚ refer to the manual for exact torque values. Tighten the axle nut gradually while ensuring proper alignment. Once tension is set‚ tighten the axle nut to the recommended torque specification. Double-check the tension and alignment to ensure smooth power transfer and prevent wear. Proper tensioning ensures optimal performance‚ safety‚ and longevity of the drive system.
Post-Assembly Inspection and Testing
Inspect the rear wheel for proper alignment and balance. Test the brakes to ensure functionality. Check the belt or chain tension and alignment. Ride the motorcycle in a controlled environment to verify smooth operation and responsiveness.
Checking the Rear Brake Functionality
After assembling the rear wheel‚ ensure the brake system functions correctly. Inspect the brake pads for proper alignment and wear. Check the rotor for damage or warping. Test the brake lever or pedal to ensure a firm‚ responsive feel. Verify fluid levels in the master cylinder reservoir and bleed the system if necessary. Perform a test ride in a controlled area to confirm consistent braking performance. Refer to the service manual for specific torque values and adjustment procedures to ensure optimal safety and reliability.
Ensuring Proper Wheel Alignment and Balance
Proper wheel alignment and balance are critical for smooth operation and safety. After assembly‚ check the wheel alignment by ensuring the rear wheel is straight and properly seated in the frame. Verify that all spacers and bushings are correctly positioned. For balance‚ refer to the service manual for recommended procedures‚ such as using a dial indicator to measure runout. If equipped‚ use a wheel balancer to add weights as needed. Proper alignment and balance prevent vibration and ensure even tire wear‚ enhancing overall performance and rider comfort.
Testing the Motorcycle Under Controlled Conditions
After completing the rear wheel assembly‚ test the motorcycle in a controlled environment‚ such as an empty parking lot. Start with slow‚ gradual acceleration to ensure proper power delivery and smooth operation. Check for unusual noises or vibrations‚ particularly in the rear wheel and drivetrain. Test braking performance by applying the rear brake firmly to confirm it engages evenly and without wobbling. Refer to the service manual for specific testing procedures tailored to your Harley-Davidson model‚ ensuring all components function as intended before riding on public roads.
Maintenance and Upkeep
Regular maintenance ensures optimal performance and longevity of the rear wheel assembly. Follow the service manual’s schedule for cleaning‚ lubricating‚ and inspecting components to prevent wear and tear.
Regular Maintenance Schedule for the Rear Wheel
A well-planned maintenance schedule is vital for the rear wheel’s longevity. The service manual recommends inspecting the wheel bearings every 5‚000 miles and lubricating them annually. Brake pads should be checked and replaced when worn below 1/8 inch. Tire pressure must be monitored and adjusted as per specifications to ensure proper traction and handling. Regular cleaning of the wheel and associated components prevents rust and corrosion‚ while torque checks on axle nuts ensure stability and safety.
Cleaning and Lubricating the Rear Wheel Components
Cleaning and lubricating the rear wheel components are essential for maintaining optimal performance and preventing corrosion. Use a mild solvent to remove dirt and grime from the wheel‚ hub‚ and axle. Apply a high-quality grease to the wheel bearings and moving parts‚ ensuring proper lubrication. Regularly inspect and clean the brake components to maintain functionality. Always refer to the service manual for specific lubrication intervals and torque specifications to ensure the rear wheel operates smoothly and safely.
Troubleshooting Common Issues
Common issues with the Harley rear wheel include wobbling or binding. Check for loose components‚ misaligned parts‚ or uneven torque. Consult the manual for diagnostic steps.
Identifying and Resolving Binding or Wobbling Issues
Binding or wobbling issues in the Harley rear wheel often stem from improper alignment or loose components. Inspect the axle nut‚ hub bearings‚ and brake assembly for tightness. Adjust the wheel bearings according to the manual’s torque specifications. Ensure the tire is properly seated and inflated. If wobbling persists‚ check the rim for damage or warping. Referencing the diagram can help identify misaligned parts. Addressing these issues promptly prevents further damage and ensures safe riding conditions. Always follow the manufacturer’s guidelines for repairs.
Addressing Loose or Over-Tightened Components
Loose or over-tightened components can compromise the stability and safety of the rear wheel assembly. Always refer to the torque specifications in the instruction manual. Inspect all bolts and nuts‚ ensuring they are securely fastened but not overtightened‚ as this can damage threads or components. Use a torque wrench to verify specifications. If a component is loose‚ tighten it gradually‚ checking alignment. Over-tightened parts may require loosening and re-torquing. Addressing these issues promptly prevents wear and ensures proper functionality. Regular inspections are crucial to maintain the integrity of the assembly.
Successful completion of the rear wheel assembly ensures optimal performance and safety. Always follow the instruction manual for precise guidance. Regular inspections and adherence to torque specifications guarantee longevity and reliability. Referencing the manual is crucial for maintaining your Harley-Davidson’s integrity and functionality.
Final Checks Before Riding
Before riding‚ ensure all bolts and nuts are tightened to the specified torque values. Verify proper brake function by testing front and rear brakes. Inflate tires to the recommended pressure and inspect for any signs of damage or wear. Double-check wheel alignment and ensure the axle nut is securely tightened. Perform a visual inspection of all components‚ including the belt or chain‚ for proper tension and alignment. Finally‚ take a short test ride in a controlled environment to confirm smooth operation and address any issues before heading out on the road.
Importance of Referencing the Instruction Manual
Referencing the instruction manual is vital for ensuring the correct assembly and maintenance of the Harley rear wheel. It provides detailed step-by-step instructions‚ torque specifications‚ and safety guidelines. By following the manual‚ riders can avoid errors that may lead to mechanical failure or safety hazards. The manual also serves as a troubleshooting guide‚ helping identify and resolve issues efficiently. Regularly consulting the manual ensures compliance with manufacturer recommendations‚ maintaining the motorcycle’s performance and longevity. It is a comprehensive resource for both novice and experienced riders‚ offering clarity and confidence in every assembly and maintenance task.
References and Additional Resources
For further guidance‚ refer to Harley-Davidson’s official service manuals‚ UserManual.com‚ and ManualLib.com for detailed diagrams and instructions. Online forums and communities also provide valuable insights and support;
- Harley-Davidson Official Website
- UserManual.com
- ManualLib.com
- Harley-Davidson Forums
Recommended Tools and Parts Suppliers
For the Harley rear wheel assembly‚ use genuine Harley-Davidson parts and tools for optimal performance. Suppliers like Harley-Davidson’s official parts website‚ J&P Cycles‚ and Dennis Kirk offer high-quality components. Tools from Snap-on and GearWrench are recommended for precision. Online retailers like Amazon and eBay provide a wide range of options. Always ensure tools and parts meet Harley-Davidson specifications to maintain safety and functionality. Avoid counterfeit products to prevent potential assembly issues.
- Harley-Davidson Official Parts
- J&P Cycles
- Dennis Kirk
- Snap-on Tools
- GearWrench
Online Communities and Forums for Support
Online forums like Harley-Davidson Forums‚ Reddit’s r/harleydavidson‚ and HDForums.com offer valuable support for rear wheel assembly. These communities provide practical advice‚ troubleshooting tips‚ and real-world experiences from seasoned riders and mechanics. Users can ask questions‚ share challenges‚ and gain insights into common issues like wheel alignment or brake installation. Many forums also include DIY guides and torque specifications‚ making them indispensable for both novices and experts. Engaging with these platforms ensures access to reliable‚ crowd-sourced knowledge tailored to Harley-Davidson models.
- Harley-Davidson Forums
- Reddit’s r/harleydavidson
- HDForums.com

FAQs
Common Questions About Rear Wheel Assembly
- What torque specs are required for the rear axle nut? Always refer to the Harley manual for precise values.
- Why does the rear wheel wobble? Check alignment‚ axle tightness‚ and wheel balance.
- Can I assemble the rear wheel without the diagram? No‚ the diagram is essential for correct component placement.
Frequently asked questions about rear wheel assembly often revolve around torque specifications‚ troubleshooting wobbling issues‚ and the necessity of following the diagram. Riders inquire about the correct torque values for the rear axle nut‚ emphasizing the importance of adhering to the manual’s guidelines. Another common concern is addressing wheel wobble‚ which typically involves checking alignment‚ axle tightness‚ and wheel balance. Additionally‚ users ask if assembly can be done without the diagram‚ but it’s strongly advised against as the diagram ensures proper component placement and safety; These questions highlight the importance of precise instructions and adherence to guidelines to prevent mechanical issues and ensure rider safety. Riders are also curious about the tools required and the time needed for assembly‚ underscoring the need for thorough preparation and planning. Overall‚ these inquiries reflect the community’s commitment to maintaining their motorcycles correctly and safely‚ relying on the instruction manual as a vital resource for successful rear wheel assembly.
Leave a Reply